This is a quick guide on how to properly import FBX files with animations into 3D Studio Max. Before starting, make sure you have the most recent FBX plugin from here.
Importing an FBX Model
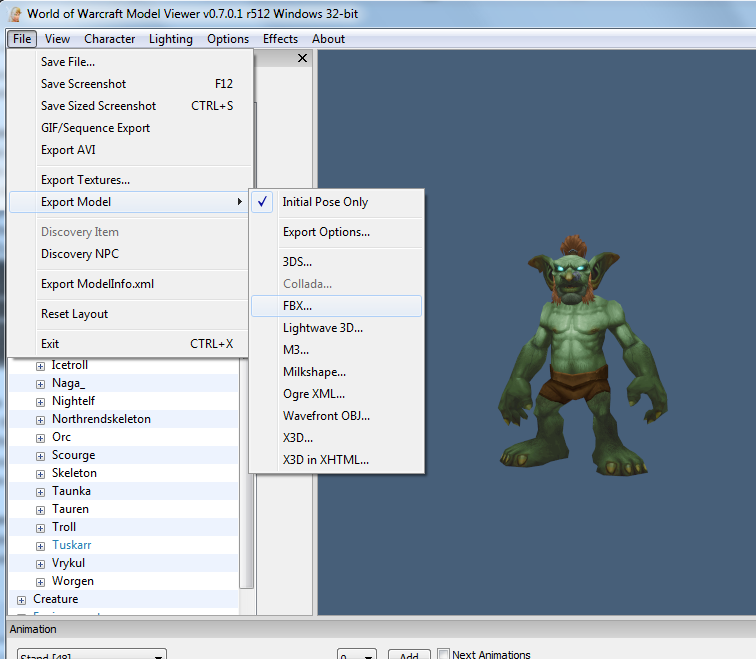
1) Select the character in WoW Model Viewer. Go to File > Export and select the FBX option. You will be prompted to select an animation name, leave this blank to export all animations.
– It may take a minute or two to fully export. The program may seem unresponsive, but it is likely still working. Be patient.
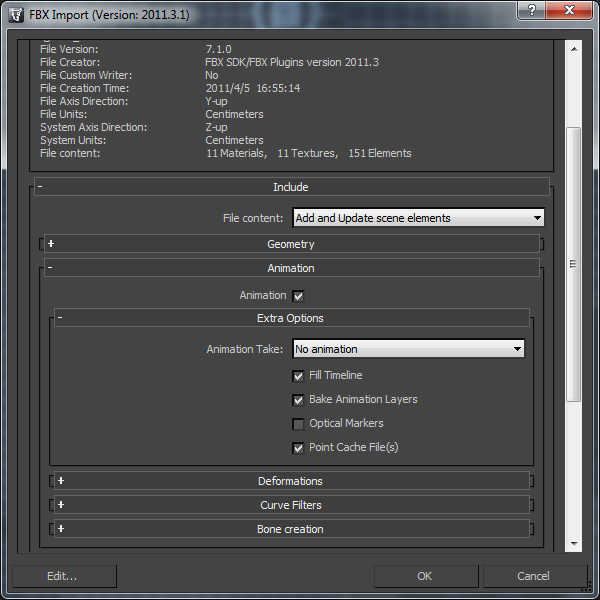
2) In 3D Studio Max, go to File > Import and select the FBX file. Under the animation section, select the “No animation” option.
– You may get a warning about the skin while importing, just click ok it won’t affect anything.
Optional Cleanup Steps
3) Remove the TurboSmooth modifier from the mesh.
4) Add an “Edit Mesh” modifier and consolidate the material slots.

Adding Animations
1) With the model still open, import the FBX file again and select an animation from the drop down list.
2) Remove the TurboSmooth modifier.
Importing animations currently has a bug which affects the last few keyframes. Fortunately, this is easy to fix.
3) Select all the bones (CTRL+A). Copy the first key and place it over the last key. (Shift-click and drag the key to the end).
– You can export the animation at this point.
Problems and Fixes
1) When trying to export in 3DS Max, I get the error “Duplicate bone name encountered”.
– This is caused by the bone names being too long. Use Tools > Rename Objects to rename the bone prefix to something shorter.

![[Pic]](https://www.lagspike.com/images/udk_alpha_masked_material.png)