Starcraft 2 game assets can be extracted using MPQ Editor.
Importing the models into 3D Studio Max
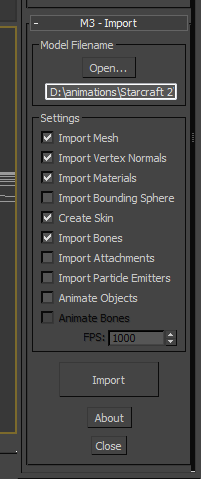
1) The M3 files and textures can be exported using MPQ Editor. The main file containing the assets is “base.SC2Assets” which is located in your SC2 directory under StarCraft II\Campaigns\Liberty.SC2Campaign
2) Download and install Starcraft 2 Model (.M3) Plugins for 3ds Max.
3) Run the 3DS Max script m3_import_v0.30.ms. Select the M3 file and import.
Rendering SC2 Characters in 3DS MAX
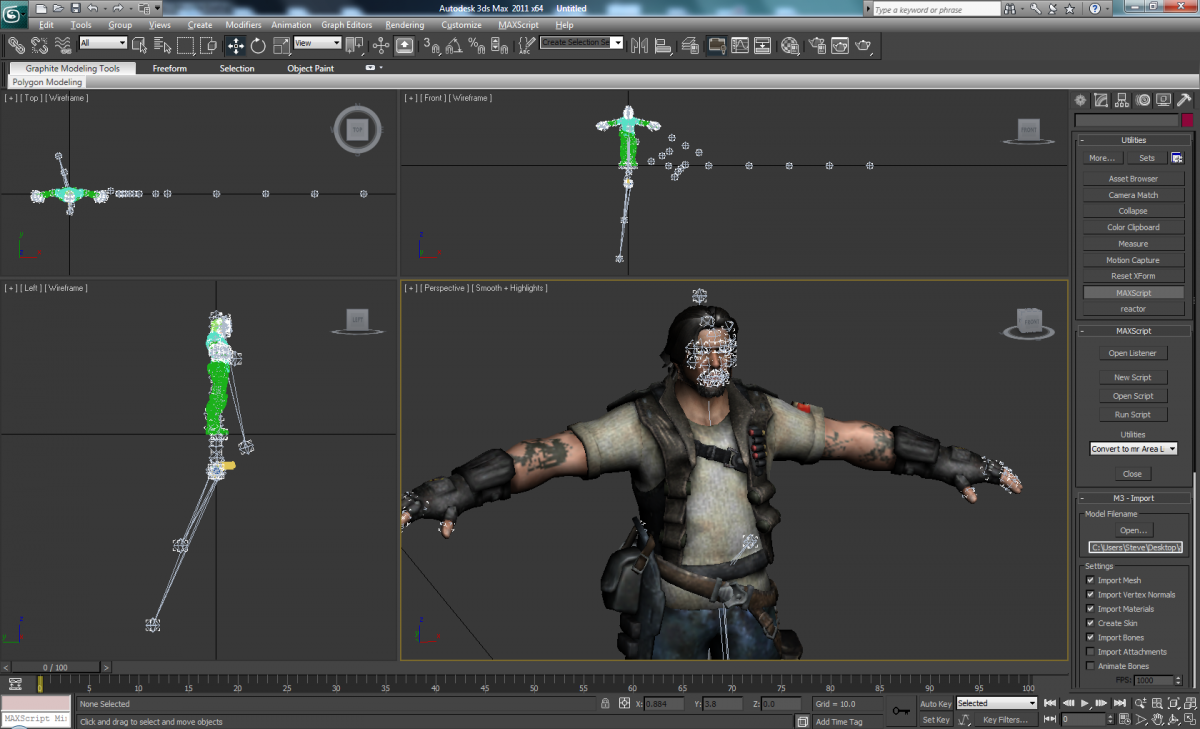
1) Import the character into 3DS Max.
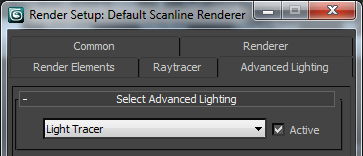
2) Add a skylight to the scene and change the rendering options to enable Light Tracer.
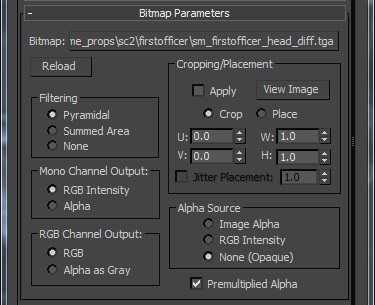
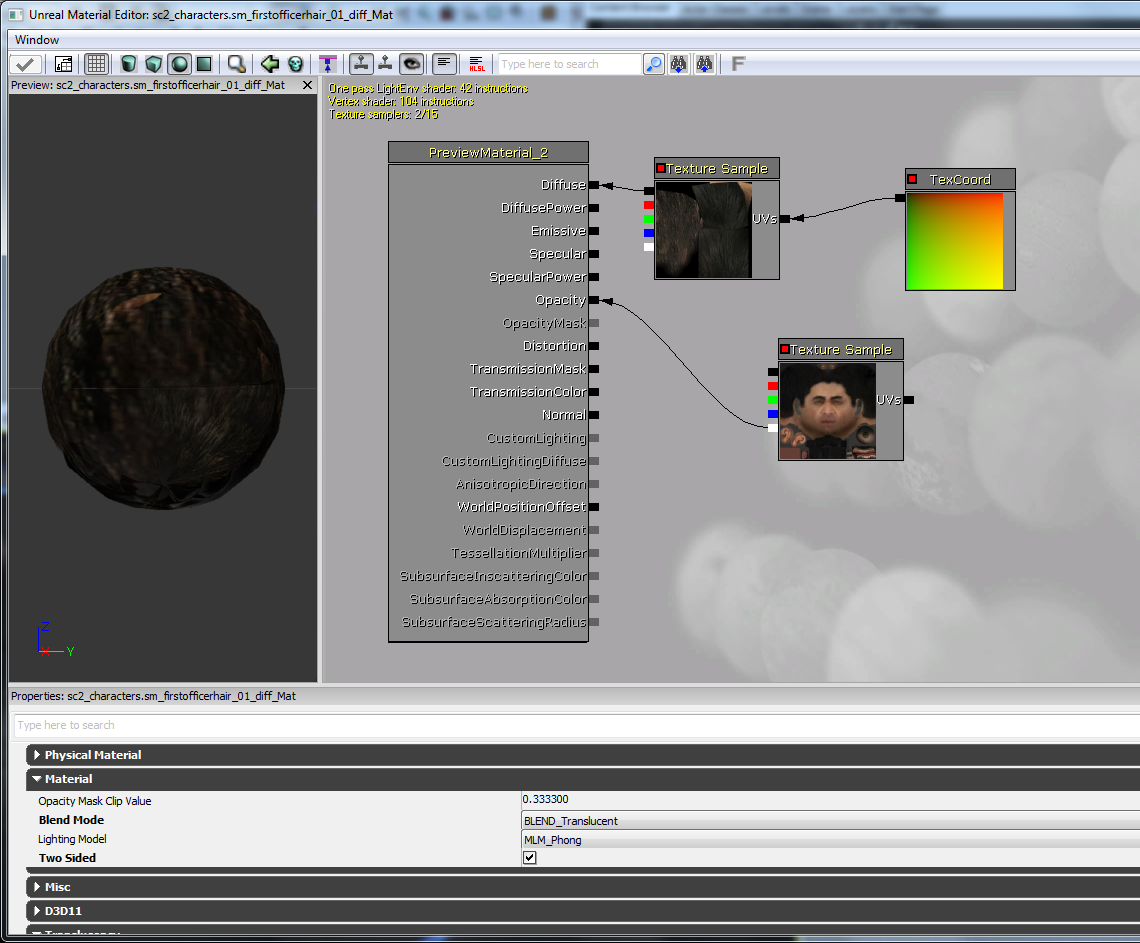
From here we will need to redo the materials. The import script uses wrong settings for the materials, so we will need to fix that.
3) Create new materials for each of the textures. Change the “Alpha Source” setting to “None”.
Converting Starcraft 2 Characters to the UDK
1) Import the character into 3DS Max with m3_import_v0.30.ms.
– Most of the characters can be found in StoryModeCharacters > Terran.
2) Select everything and scale by 25000%. Reposition the model as needed.
– Any extra meshes and their bones can be deleted (example: the SM_RaynorCommander model has a gun and shot glass included).
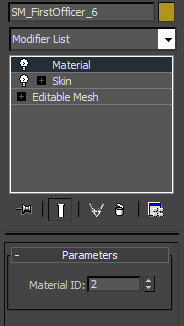
3) Rename the meshes (head, teeth, etc) and apply a unique material ID to each of the meshes.
– Note: While you do have the option to attach the meshes together, doing so would break the face bones needed for facial animation.
4) Export with ActorX. Import the character and the textures into the UDK.
– Some of the character textures use a 2048×2048 resolution. Select TEXTUREGROUP_Vehicle when importing to prevent them from being re-sized.
– Some materials may need their texture coordinates changed (example: SM_FirstOfficer’s shoulder pads).
– The hair materials can be tricky and may require experimenting to find the best look.
– The eyes may need to have a separate material assigned in 3DS Max.
– A script can be used to create a biped rig.
Creating facial animations
1) Select the mouth bones. Link them to the biped head (Bip001 Head).
2) Export the reference PSK in ActorX.
3) Create the FaceFX poses using this guide.
4) Export each face pose as a separate PSK, then import into the UDK as morph targets.
– Rotating the jaw bone will control the teeth.
– You may want to delete the tongue mesh.
Tips
Some of the file formats contained in the MPQ files include:
.m3 – Contains meshes and sometimes animations as well.
.m3a – Contains additional animations. It is currently not possible to load these into 3DS Max.
.fxa – FaceFX file. These contain the facial animations.
– The Starcraft 2 Previewer can be used to find the material settings for the .m3 model file.
– The textures are in DDS format and should be converted to something more manageable (like TGA). You can use NConvert, or the save image feature in 3DS Max for this.
– Some textures have duplicates in different sizes. Check to make sure you’re using the highest resolution available (usually 2048×2048).
– Emissive textures will have a coordinate index of 2.
Helpful Links
Converting Starcraft 2 Props to the UDK
SC2 Model Previews