Converting Starcraft 2 Props to UDK

  1. Export files using the SC2 Archive Browser. Models are in M3 format, textures are in DDS format.
    1. Make sure to add your SC2 texture directory to 3DS Max by going to Customize > Configure User Paths prior to importing models.
    2. Most of the background environments can be found in StoryModeSets > Terran.
  2. Import the M3 model files into 3DS Max using m3_import_v0.31_lagspike.ms, which is a slightly modified version of this plugin. [Pic] Make sure sc2_objects.ms is in your 3DS Max plugins folder prior to this.
    1. Some scenes will have multiple M3 files (name_00.m3, name_01.m3, etc). They can take up to 3 minutes to import.
    2. If you are importing multiple m3 files of the same name, you will need to rename the meshes after everything is imported (Tools > Rename Objects). [Pic]
  3. Select everything and scale by 250%.
  4. Clear the extra UV channels.
    1. Some models have emissive textures and will need a second UV channel.
  5. Export all the meshes in ASE format to a new directory.
  6. Export the Summary Info file in 3DS Max (File > Properties > Summary info. Press the “Save to File” button). Save as summary_info.txt to the new directory.
  7. Copy the toolbox folder to the new directory.
    1. Optional: Run copy_m3_textures.bat to copy *all* textures (normal, light map, etc).
  8. Run convert_sc2_models_to_udk.bat.
  9. Import the textures into UDK.
  10. Save the package.
  11. Import the ASE files into UDK.
  12. Save the package.
  13. Import t3doutput.t3d into UDK.
    1. Alpha materials will have to be manually fixed in UDK.

Output Example #1

Helpful Links
SC2 Model Previews

This tutorial has been updated 1/28/16.

Ripping Gamecube Models with 3D Ripper DX

Ripping Gamecube models with 3D Ripper DX is similar to ripping models from other games.

In addition to 3DS Max, you will need:
Dolphin Emulator [Download]
3D Ripper DX

– I recommend “dolphin 3.0-226 32-bit” and 3D Ripper DX 1.8.1 (this is the combination I use).
– This will only work with a 32 bit version of Dolphin Emulator.
– Resizing the window may give you problems.
– I’ve only tested this with one game, so your results may vary.

Start 3D Ripper DX and select the Dolphin EXE. Hit the launch button.

Once the Dolphin EXE launches, press the open button and select the game file.

If everything worked you should now see a “Ready to capture” message in the top left.

Play through the game until you reach a point you are ready to capture. Use the assigned capture key (F12 by default).

When importing into 3DS Max, make sure you uncheck “Ignore if rendertarget width does not match backbuffer”.

Example Output #1

Links
Alternate Tutorial

Big List of Useful Programs and Websites

People often ask what programs I use to create machinima. The answer to that depends on what you want to do, but here’s a big list of programs I use. I’ve included a number of download mirrors, but more current versions may be available on the main site.

General
NConvert
Youtube Downloader HD
Fraps
Audacity
UDK
MysticThumbs [Download x86] [Download x64]
FastPictureViewer – Allows TGA thumnails.
ImageMagick
AutoIt – Allows you to automate tedious processes. AutoIt commands.
Virtual Dub – A small program which is useful for converting video.

Model Exporting
Umodel [Download]
3D Ripper DX
GameAssassin [Download]
Xbox Backup Creator – Used to open and extract Xbox files. [Download]
wxRipper – Used to open and extract Xbox files. [Download]
Noesis [Download]
Dolphin Emulator [Download]

World of Warcraft
WoW Model Viewer [Download]
Machinima Studio
MPQ Editor
WoW Model Exporter [Download]
WoW Machinima Tool – A tool for adding visual effects within the WoW game client.

3DS Max Plugins and Scripts
SMD Importer [Download]
SMD Exporter [Download]
Starcraft 2 M3 Plugin [Download]
WoW M2 Import [Download]
Batch Preview Maker [Download]

Editors
Notepad++
UltraEdit
XVI32 – A free hex editor. [Download]

Source Engine Tools
Crafty – A Valve map viewer and file browser, with export capabilities. [Download]
VTFEdit – A tool to view and convert Valve VTF files. [Download]
GCFScape – Allows you to browse and extract files from Valve packages (GCF, VPK, BSP, PAK). [Download]
MDLDecompiler – A tool to decompile valve MDL files into SMD format. [Download]
VTA Apply – Allows you to extract VTA animations from SMD model files. [Download]
GUIStudioMDL – Used to compile QC files. [Download]
Source SDK
MDLTextureInfo [Download]
BSPSource A map decompiler for Source games. [Download]
HLLib – Command line tool to extract content from Valve package files. [Download]
Propper – Propper allows you to compile VMF brush data as an SMD file.
VMEX – VMEX is a map decompiler for Source games.

Video Editing
Sony Vegas Pro – Easy to learn and powerful. The most popular choice for machinima makers.
Adobe After Effects
Adobe Premiere Pro – Works well with the other Adobe programs (After Effects, Photoshop).
Final Cut Pro – Very popular among indie film makers. Mac only.
Avid – Avid is the industry standard editor. Any Hollywood movie you’ve seen was likely edited on this.

Garry’s Mod Addons
Better Camera [Download]
Moving Camera [Download]
NPC Scene [Download]
TF2 Machinima NPCs [Download]

Useful Websites
Xentax – A game research forum. Contains lots of information about file formats and game data.
Voice Acting Alliance – A community dedicated to voice acting.
MachiniFeed – An RSS feed of machinima blogs and related sites.
Freesound – A huge collection of free sound effects.
Video Copilot – Video tutorials for Adobe After Effects.
8bitcollective – A collection of royalty free 8-bit music.
Video Copilot – The absolute best After Effects tutorials.

Using Motion Capture with a Biped

Using Motion Capture Files with a Biped
Motion capture file formats include BIP, BVH, and CSM. BIP files are the easiest to work with, try to use them if you can. This tutorial assumes you have a biped rigged character ready in 3DS Max.1) Select the Biped. Under the Motion tab, find the Motion Capture section.
2) Click the “Load Motion Capture File” button and select the file.
At this point you will be able to preview the animation before making any adjustments.

Adding Layers
At this point you may want to make adjustments to the animation. You can do this through the use of Layers.

1) On the Layers rollout (under the motion tab), click Create Layer.
2) Turn on Auto Key and animate like you normally would (in this example I simply lifted his left arm).
– The red stick figure represents the original motion.

Creating a Walk Loop
Often times animations will have the character walk around in world space, but for machinima purposes you may not want them to leave their starting position (so you can keyframe their movement in the game engine instead). This is easy to fix.
1) Create a new biped layer.
2) Select the root bone (usually Bip001).
3) Turn on Auto Key.
4) Set the Y position of the first and last keys to 0 (right-click the move tool and enter the value).

Tips
– Check how the hands and fingers look during animations. A closed hand will often looks more natural.

Converting BVH to BIP
Batch convert BVH to BIP
Reducing Keys

An Introduction to the Starcraft 2 Editor

This is a guide that will cover the basics of how the Starcraft 2 assets can be previewed. This guide is intended for understanding how the cutscenes work.

How to preview models
1) Open the editor and go to File > Dependencies.

2) Click the “Add Standard” button and select everything (there should be 4 items). Click Ok.

3) Go to Window > Previewer
– This is your model viewer. Use the tree on the right side to find models.
– Most of the high quality cinematic character models are in Assets > StoryModeCharacters
– Additional character models can be found in the portraits directory.

Viewing the cutscenes
1) Download the SC2 cutscene files from here. This will allow you to play the cutscenes in the editor.
2) Go to File > Open and select one of the scene files.
3) To select the default camera view, Go to View > Camera, then select the camera with the Cam_Export suffix.

– At the bottom are standard playback controls: play, pause, etc.
– Unfortunately, there’s not much you can do with these cutscenes other than see how they’re put together.

SC2 Model Previews

Converting WoW Models to UDK with Machinima Studio

Machinima Studio is a useful tool for exporting WoW assets. This tutorial also covers how to import the assets into UDK, which is an optional step.

Converting M2 Models with Machinima Studio
Machinima Studio has thumbnail browsing, which is a big advantage over WoW Model Viewer when looking for models. The downside is the textures are usually exported as JPG, meaning they generally will need to be converted to something a little more universal (TGA or PNG).
1) Locate the model

2) Export as a OBJ file.

2) Run the 3DS Max script obj_to_ase.ms to convert to an ASE file.
– Make sure 3DS Max is set to use the correct OBJ import settings and the correct ASE export settings.
3) Copy the toolbox folder to the new directory.
4) Run convert_ms_models_to_udk.bat.
Import the textures into the UDK. Save.
Import the ASE files into the UDK. Save.

Output Example #1

Converting Skyboxes to UDK
One benefit of using Machinima Studio is it exports the WoW skyboxes complete with all the textures.
1) Locate the skybox you wish to use and export as an OBJ file.
– Skyboxes can be found under Models > Environments > Stars.

2) Run the 3DS Max script obj_to_ase.ms to convert to an ASE file.
3) Copy the toolbox folder to the new directory.
4) Run convert_ms_models_to_udk.bat.
Import the textures into the UDK. Save.
Import the ASE files into the UDK. Save.
– The materials will each need to be examined to determine the settings needed. Everything should be set to emissive. Things like clouds and stars should be set to additive or masked. [Pic]
– Moving objects in the sky (such as clouds) can be accomplished by adding a rotator or panner in the material editor.

Output Example #1

Adding Custom Animations to Left 4 Dead 2

Note: This tutorial is no longer recommend as a way to make L4D/L4D2 machinima. It is much easier to move the assets to another game (Garry’s Mod or UDK) than to use custom animations within L4D. However, I will leave this tutorial here in case someone is really curious about the process.

Creating a Left 4 Dead 2 Scene
Part I: Lip-sync
L4D2 has a few differences you need to be aware of, compared to other source games. I spent a good amount of time figuring out how to make a scene, and documented the process for anyone else who is looking to learn.
1) Start by creating the Faceposer files.
– Make sure you add the phonemes before aligning the words, or else the program will crash.
2) Once your vcd files are finished and saved, go to File -> Rebuild scenes.image.
3) After that has finished, copy your scenes.image file from left 4 dead 2\left4dead2\scenes to left 4 dead 2\left4dead2_dlc2\scenes.
4) Rebuild your sound cache by going into the game console and typing snd_rebuildaudiocache.
– This will take a few minutes so make sure you add all your audio files before running this command.

Part II: Creating a $definebone file for the model.
Before you can use custom animations, you will need to create a $definebone .qci file.
1) Decompile the original model.
2) Open mdldecompiler.qc and remove the $lod lines. There should be about 3 of them at the top of the file.
3) Open the command prompt and run the following command “studiomdl -definebones mdldecompiler.qc > sharedbones.qci”
4) Delete the lines from sharedbones.qci that don’t start with $definebone.
5) The hand bones in the qci file will contain junk data. Notice how the highlighted numbers are different than the other lines. This will make the character hands act funny. Fix this by changing it to 0.000000 0.000000 0.000000.

Part III: Custom Animations
L4D2 doesn’t have many animations that are useful for conversation, so it goes a long way to make a few of your own. Again, compared to other Source games this requires a little more work.
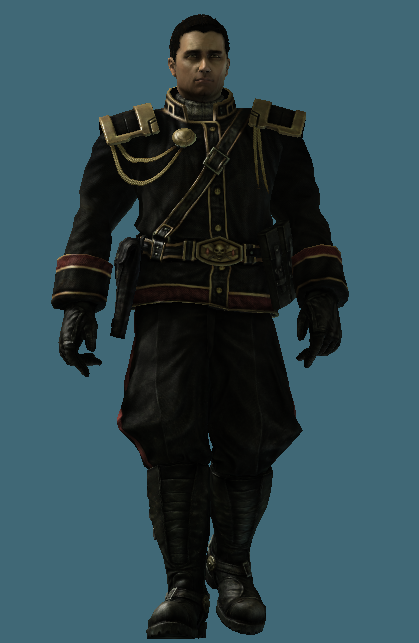
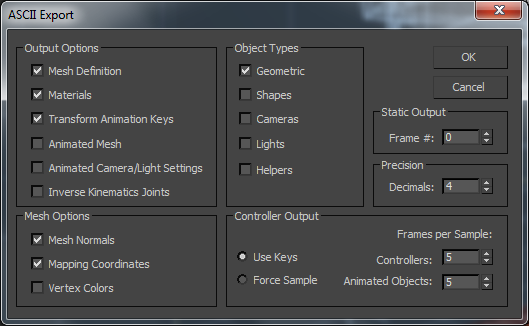
1) Create your animation in 3D Studio Max and export as an .smd file.
2) Use this tutorial for the next few steps to set up the .qc file.
My .qc file looks like so:

$modelname "survivors/anim_mechanic.mdl"

$includemodel "survivors/anim_mechanic_original.mdl"

$include "ellis_bones.qci"

$sequence z_stand_still "stand_still.SMD" ACT_NONE 1 fps 30.00

Part IV: Hex Editing
This next part is L4D2 specific. You will need to use a hex editor to change a file in order for it to read from your newly created animation file.
1) Open pak01_dir.vpk with a hex editor.
2) Search for the name of the animation file. In this example it’s anim_mechanic. There will be two results. Replace the second one with anim_mechnaniz.
– By changing this name the game will look for the local file, otherwise it will use the animation file stored in the .vpk files.
3) You should now be able to preview your animation using the model viewer.

Part V: Mapping
You will need to create a custom map to play your .vcd files. See the vcd_tutorial attachment for a very basic example.

Part VI: Recording
You should now be ready to play your scene in game. It’s a good idea to use players as actors rather than bots. The bots tend to move around a lot randomly.
There’s a few camera options you can try:
Noclip – Very basic and easy, but requires a dedicated cameraman.
Recording a demo – The built in demo recorder is the only way to record something in game (ie without Fraps), but is not really ideal for machinima. It is an option though.
Built in cameras – Cameras can be placed in the map file that can be triggered. Unfortunately there’s no way to preview where these cameras a looking. The attached map l4d_camera_tutorial provides an example of a moving camera intro.
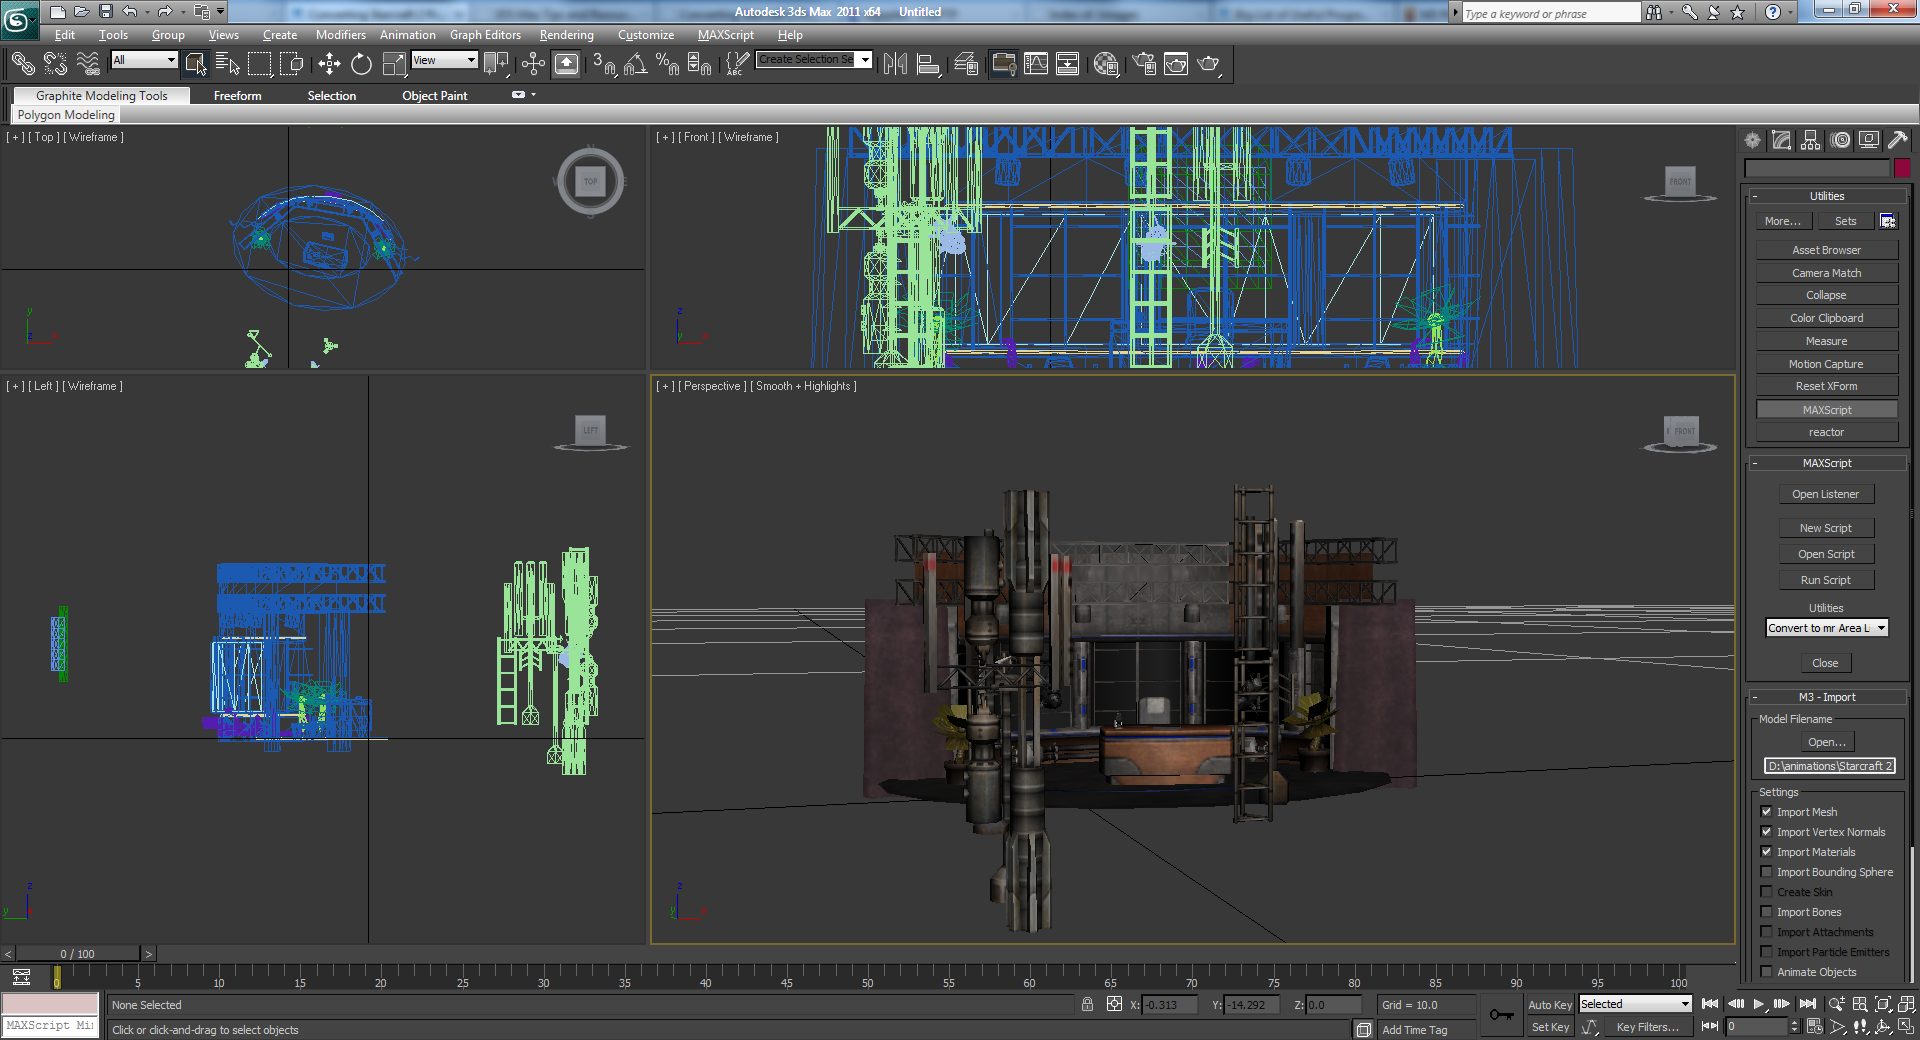
Game Visual Examples

Deus Ex: Human Revolution

Tron Evolution uses the Unreal 3 Engine. The game assets can be extracted using Umodel.
– Some of the character meshes are rotated at an awkward offset.
– The light cycles seen in the Tron Legacy movie are versions 4 and 5.
– Fraps footage will have the “GridGame” prefix.
– The game packages have the extensions .upk and .umap. They can not be opened in the UDK (gives a licensee error).
– Packages are located in “Disney Interactive Studios\Tron Evolution\GridGame\CookedPC”.

Alice: Madness Returns uses the Unreal 3 Engine. The game assets can be extracted using Umodel.
– Fraps footage will have the “AliceMadnessReturns” prefix.
– The game packages have the extensions .upk and .umap. They can not be opened in the UDK (will cause UDK to crash).
– Packages are located in “EA Games\Alice Madness Returns\Alice2\AliceGame\CookedPC”.

Dead Rising 2 works well with 3D Ripper DX, but there’s not many machinima possibilities within the game itself.
– Extracted audio files will just have numbers for a name, making it difficult to locate specific sounds.
– Fraps files will have the “deadrising2” prefix.
– This game contains a number of comedic props, use 3D Ripper DX to extract them.
Extracting Files
Dead Rising 2 uses .big files to store data. These can be extracting using Gibbed.DeadRising2.Tools.
1) Locate the file you wish to extract. Drag it on to Gibbed.DeadRising2.Unpack.exe
– The .big files can be found in “Capcom\Dead Rising 2\data”
– The audio files are mostly in .adw format, which is basically a .wav file.
– The most useful thing you can get from this extractor are the audio files. It is possible to extract textures and some models as well, but it would likely be a lot easier to use 3D Ripper DX for that.

Duke Nukem Forever uses a heavily modified Unreal 2 Engine. The game assets can be extracted using Noesis.
– A tutorial for extracting models can be found here.
– Game music can be found under “Duke Nukem Forever\Music”.
– Sounds can be extracted by using Noesis to export the SoundDir.dat file.
– Fraps files will have a “DukeForever” prefix.

Mirror’s Edge uses the Unreal 3 Engine. The game assets can be extracted using Umodel.
– Mirror’s Edge is one of the few Unreal based games that allows access to the Unreal Editor.
– While you can use the editor to explore the assets and preview the levels, you won’t be able to build the same lighting.
– The editor is a very dated build and not recommended for building levels. If you wish to explore the levels, delete all the kismet sequences and game specific actors (example: TdTutorialStart) to prevent errors.
– Fraps footage will have a “MirrorsEdge” prefix.
– The game packages have the extensions .upk and .me1. They can not be opened in the UDK (gives a licensee error).
– Packages are located in “EA Games\Mirror’s Edge\TdGame\CookedPC”.

Mirror’s Edge Map Examples
SP00/Tutorial_p.me1

SP01/Escape_Off.me1

SP04/Subway_Plat.me1

SP09/Scraper_Lobby.me1

Minecraft Machinima Info

Minecraft is known for its extensive mod possibilities.
– Fraps footage will have the “javaw” prefix.
– Textures can be found in “C:\Users\username\AppData\Roaming\.minecraft\bin\minecraft.jar”.

Minecraft to UDK
Enlarging the Textures
The textures will need to be enlarged and separated before import into UDK.
1) Open terrain.png in Photoshop.
2) Go to Image > Image Size. Set the scale to 3200% and select “Nearest Neighbor” from the dropdown.
– This will create block textures that are 512×512.

Because Minecraft environments are made out of blocks of the same shape, we will only need a single block which we can then duplicate and create different materials for within the UDK.
– Note: Tree textures are not two-sided.

Output Example #1

Minecraft to OBJ converter
Minecraft Skins
Minecraft Texture Packs
Minecraft style maps for TF2 and CSS
Minecraft human model rigged

3DS Max Tips and Resources

3D Studio Max is used for importing and exporting 3D objects which can be used with a variety of programs. It can also be used for creating original models and animations. Why use it over Maya, Lightwave, or Blender? The biggest reason is it offers the most support. It has more tutorials and more third party scripts than the competition. If you are using game assets chances are you won’t have problems with 3D Studio Max.

Keyboard shortcuts
Z – Zoom on selected object.
F3 – Toggle wireframe mode.
ALT+W – Maximize the viewport.

Rendering for Compositing
1) Open the model in 3DS Max. It should have materials applied already.
2) Add a Skylight to the scene.

3) Go to Render -> Render Setup. Select the output size you wish to use. Under the “Assign Renderer” section, make sure “Default Scanline Renderer” is selected.

4) Under the Advanced Lighting tab, select Light Tracer from the drop down.

You are now ready to render to whichever format you wish. A PNG or TGA sequence is recommended (make sure it has an alpha channel).

Output Example #1
Output Example #2

Problems and Fixes
1) The XYZ arrows goes missing.
– Press X to toggle on/off.
2) I am unable to move or alter an object.
– Try pressing space bar to unlock the model.
3) How can I divide an object in half?
– Try using the slice modifier.
4) How can I center an object in the viewport?
– Press the Z key.
5) How can I copy animation keys?
– Hold shift and drag the selected keys.
6) How can I add a directory of assets (textures, etc)?
– Customize > Configure User Paths
7) How can I match the scale of an object?
– Tools > Align > Align
8) How can I center my object’s coordinates?
– Edit > Transform Toolbox > Center
9) How can I import sound files into 3DS Max?
– Open the Mini Curve Editor. Double-click the Sound setting.
10) The bounding box around my mesh is crooked. How can I fix this?
– Make sure your mesh is selected. Go to the utilities tab. Press the Reset XForm button. This will rebuild your bounding box.
11) How can I change the viewport layout?
– Views > Viewport Configuration > Layout Tab
12) How do I use an alpha map?
– Under the Maps section for the material, enable Opacity and add the alpha texture. Under “Bitmap Paramaters”, set “Mono Channel Output” to Alpha. Set “Alpha Source” to Image Alpha.
13) How can I change or add map paths?
– Move your Max file into the new maps folder and open it from that location. By default, Max will always look within the root of the Max file for map files. Once the file opens and finds all of your maps, save the Max file back to the original location – then all of your map paths will update.
14) How can I reset my 3DS Max user settings?
– See this link.
15) What is causing this yellow box when I mouse over the grid?
– The “Snaps Toggle” is on.
16) The right-click menu is disappearing.
Disable the window transparency in Windows 7.

Helpful Links
Texturing Tutorial
Character Creation Tutorial
CGPersia Forums
3DS Max Cheat Sheet
TF2 3DS Max Render Example